Learning how to draw the hips, bottom and genitalia can be quite complex. The pelvic region is the juncture between the torso and the legs, lending it a fair amount of structural complexity despite its apparent simplicity. Many muscles in the legs and torso anchor at the pelvis, making it vital for describing complex and dynamic poses.
A lot of the difficulties of drawing this part of the body stem from misunderstanding how the legs attach to the torso. One common issue is creating a fork with the legs – like a stick man – which doesn’t account for the top of the leg attaching to the side of the pelvis. When this is taken into account, alongside the way the muscles of the leg attach to the pelvis, you should start to notice it on the figure. See our how to draw legs tutorial for more pointers on legs.
There is also the surface features of the genitals here. Whilst not a major body structure, the genitals should not be ignored, as it usually stands out more when they are omitted!
As we get into the latter stages of our drawing, as with many how to draw tutorials, remind yourself to keep a light touch, and to keep your edges soft, especially when rendering shadow. It is very easy to make our shadow shapes generic across the body – usually too hard or too soft – but the body itself has a mixture of firm, bony areas, and softer areas. Whilst the pelvis is a large structure, much of it is covered in fat and muscle, which both create rounded forms.
01. Create tilt of the hips

The first things to look for in this region of the body is the sideways tilt of the hips, and the placement of the centreline. The angle of the hips is really important in the setup of the overall pose. Note that the hips can tip forwards or backwards in side views instead. To find this, I look for any symmetric bumps or dimples and compare then to the horizontal. Be sure to check for how the side of the body is behaving as well, as it will compress when the hips tilt towards the shoulder.
02. Make landmarks of the pelvis

The pelvis is mostly disguised by muscle and fat. We can see some key landmarks that will help us navigate the body. At the front, we can see the end of the iliac crest as a small bump on each side, whilst the genitalia create a reference for the centreline of the body. In a rear view, we can see the other end of the iliac crest either side of the sacrum as a pair of dimples that form a triangle with the top of the crease for the buttocks. These landmarks are useful for navigating gesture and structure.
03. Simplify pelvis structure

Because the bone structure of the pelvis is very complex, it is common to simplify it to a box or bowl shape. This gives us a handy under-drawing on which to work. I usually go with a box, since the landmarks for the iliac crest are symmetrical, and are therefore great for anchoring a straight line to. Draw very lightly at this stage. Typically, female bodies have a wider, more open pelvis, whilst male bodies have a narrower pelvis – there is a lot of variation between individuals, however.
04. Create legs and hips

One common issue with drawing the hips is letting the legs split like a fork at the centre. If we look at the bones, we can see the humerus attaches at the side of the hip, allowing the leg to go straight down rather than out at an angle. As I lay in the contour lines, I am mindful of the angles for the lines for the legs, especially where the top of the thigh curves out from the contour of the hip.
05. Make front of hips

We can see this group of muscles as a small, round form just below the bump for the iliac crest. They are especially apparent in more stretched out poses, or when you can see the front contour of the leg and hip, there is a little straight bit between the thigh and iliac crest. On someone who is very lean, there is sometimes a small indent here, where the sartorius muscle connects to the same area.
06. Rear muscles of the hips

The gluteus maximus makes up the bulk of the form of the back of the hips, although it is typically covered by cushioning fat. This large form recedes to make room for the head of the femur. Around the side of the hip, the gluteus medius creates a smaller bulge. These two muscles clasp onto the pelvis, and accompanied by the flexors at the front, stretch or compress as the leg moves to the front, back and side. Here they are fairly inactive, but they create small shadows as they work.
07. Draw genitalia

Genitals are the most obvious difference between the sexes, and vary between individuals. Pubic hair may or may not be present in both sexes. In male models, the penis is often a little darker in tone than the surrounding skin. Because the penis is a surface feature, effectively hanging from the pelvis, it will move with the pose. For female models, genitalia is often relatively hidden, with the pubic hair and small pad of fat at the front of the pelvis usually being the main features to draw – below this you may see a small crease for the labia majora.
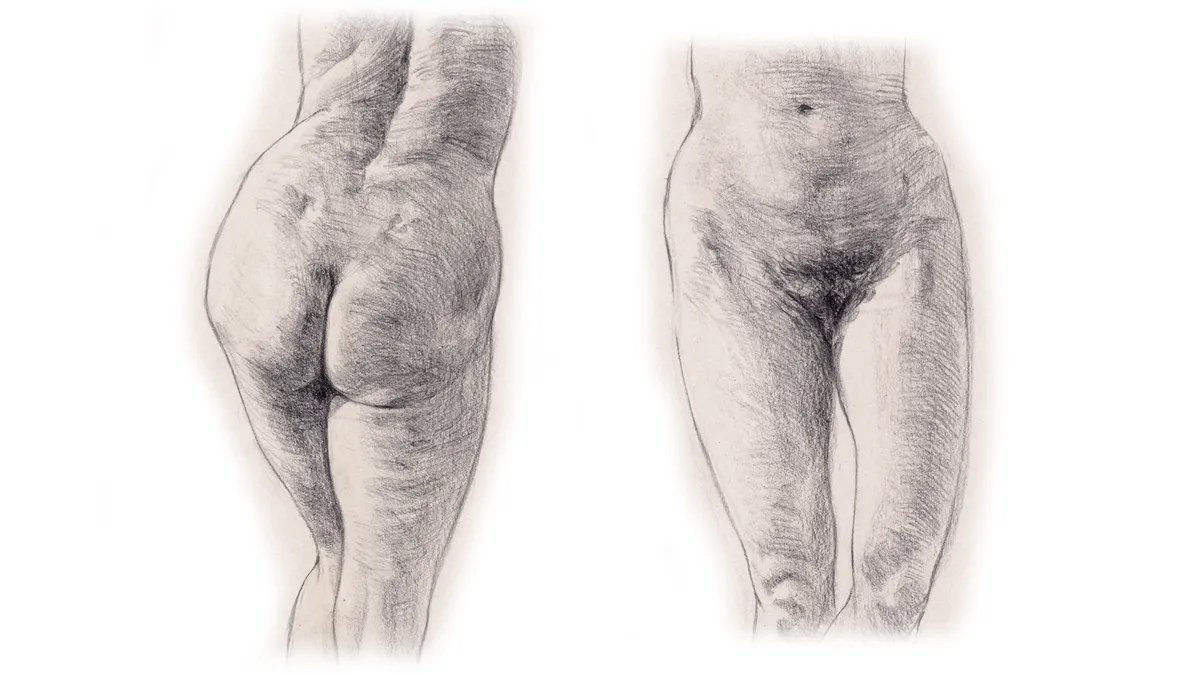
08. Draw buttocks

The central furrow for the buttocks starts just below the sacrum, and can be rendered as a line that merges into shadow forms typically found at the top of the legs. The crease underneath the buttocks deepens when the muscles are relaxed, and starts to soften when the muscle is flexed. It will start to disappear as the leg is raised or bent, as the gluteus gets stretched out, as seen in the leg of the illustration. The downwards curve of the buttocks tends to fall into shadow, which will contrast with the lit top of the thigh.
09. Make side view

At this angle, the head of the femur is quite prominent, creating a bulge in the side of the hip. I have also ensured that the line for the hip flexors clearly overlaps the abdomen at the front, whilst the line for the buttock cuts into the top of the thigh at the back. At this view, we can see how the forms of the hip slot on top of those of the torso, with the gluteus and flexor muscles wrapping around the hip.
10. Block in the shadow

Once all the major forms have been worked out, I am blocking in the large shadow areas. The hips generally have very soft forms, so we want to make sure that our shadow edges represent this – if they are too sharp, we lose the sense of volume we want. Use a light touch to make these transitions. It is important to still be mindful of the anatomy and to search for how this affects the undulating edge of the shadow.
11. Accentuate darker forms

As I start to work to the last details, I am looking for areas where the shadows are deeper – such as the crease of the buttocks, or for the pubic hair. These areas are often dark enough to even contrast quite dramatically with the surrounding area. Try to layer in your marks for these stages and build up tone, looking for places where they blend into the surrounding shadow. With pubic hair, be mindful of the hair textures you are rendering – try to avoid scribbling!
12. Adjust the forms

Using a build up of hatching lines, I am slowly working around the hips with marks to push the forms. These lines should follow the surface they are on, as if they were sculpting out the forms underneath. Having awareness of the direction the muscles pull in will help with showing how the buttocks blend into the forms of the hips as well. Try not to let the directions of muscles dictate your hatching lines, but instead keep in mind how it is pulling the fat and skin on top. Fat and skin each have their own surface direction too.
13. Add final details
To finish, I am just going over the drawing as a whole. For the contour, I am letting some edges run soft, especially in the shadow areas. Soft edges help to imply soft forms! Try to keep the transition from the hips to the rest of the body smooth, and make sure the overlapping lines in your drawing are clear – here, the outline of the hips overlaps the rest of the torso, indicating they are angled towards us.
This article was originally published in Paint & Draw: Anatomy. Buy the bookazine from Magazines Direct.